How to Shock Chlorinate and Sanitize your Water Well
Podcast: Play in new window | Download
Subscribe: RSS
In this episode, I discuss how to shock chlorinate and sanitize your well with chlorine bleach. This is sometimes referred to as “shock chlorinate” because it uses a high dose of bleach to kill bacteria, eliminate odors, and oxidize iron and other contaminants. I also explain why it is important not to add too much or too little bleach and other safety steps to follow.
What You’ll Hear in this Episode
1. What is shock chlorination?
2. Testing for bacteria and other contamination
3. Reasons for shock chlorinating your well
4. The Right Procedure in chlorinating your well yourself
5. Precautions to take in chlorinating your well yourself
6. What kind of chlorine to use in shock chlorinating your well
7. How to find a certified well contractor in your area
8. Why it’s important to mix and add the chlorine in a well-ventilated area
9. Identifying the source of well contamination
10. When to call a professional well contractor
11. When is it safe to use the water again after chlorination
12. Benefits of shock chlorinating your well

Transcript
Hello! Thanks again for tuning in to the podcast. I am Gerry Bulfin, a water treatment contractor and WQA-certified Master Water Specialist. I hope you’re having a great day and that everything’s going great for you and your water.
In this podcast series, I’m providing useful, easy-to-follow tips and information, mostly about well water, well water treatment systems, and how to improve the quality of your well water.
Free Download of Guide
In today’s episode, we’ll cover the basics of shock chlorinating and sanitizing your well, pipelines, and storage tanks.I actually have a free guide for this podcast called How to Shock Chlorinate Wells, Pipelines, Storage Tanks, and Systems. This is an easy-to-follow guide with step-by-step lists of what to do and very useful charts to show you how much chlorine bleach pellets or powder to add based on the size and depth of your well.
I’m offering that free to listeners in this podcast. You can get your guide by texting the word SHOCKGUIDE, just one word, to 44222 or going to cleanwaterstore.com/podcast. You can find it there. So text the word SHOCKGUIDE to 44222, and we’ll send it to you.
Shock Chlorination
So what is shock chlorination? Well, shock chlorination means that you’re adding sufficient bleach (bleach is liquid sodium hypochlorite, or if it’s powdered bleach or pellets, it’s calcium hypochlorite) to raise the chlorine concentration inside the well, tank, or pipeline to between 200 and 300 parts per million. This kills bacteria and sanitizes the well. That’s the main reason. It’s also good for odors. But most people shock chlorinate the well to sanitize it and to kill bacteria.
The city water has between .2 and 2 parts of chlorine per million. So, shock chlorinate means you’re adding a high amount of chlorine, usually two to three hundred parts per million. If you leave it there long enough, it will kill the bacteria.
For best results, the chlorine level must be maintained in your well for 6 – 12 hours, and it helps if the pH is between 5 and 7. If you have a very high pH, such as 8/8.5, it doesn’t work as well and is much less effective. So it doesn’t hurt to check the pH.
Most of the time, the pH is around neutral, but there are many cases where the well water pH is high, and then the shock chlorination is not as effective unless you add some citric acid or something to lower the pH, but we’ll get into that in a minute.
So after 12 hours, at least 6 hours or up to 12 hours after you added the chlorine, you test it again for chlorine. If you find you have less than ten parts per million, then you repeat the procedure. So, what happens is when you add chlorine to the water, there is a term called chlorine demand. The bacteria, the slime, the odors, and the different organic materials in the water will demand chlorine and use it up. So if you find that you add chlorine to the water and come back 6-12 hours later and find out that you have 0 chlorine, then you have to repeat the procedure. That’s pretty unusual.
Most folks say they are getting too much chlorine or not enough chlorine, but a lot of folks don’t even test the chlorine at all. They do a smell test. So, during the time that the chlorine is in the water, not only does the strong oxidant react suddenly with the micro-organisms and other organic matter, but it also can affect rubber and plastic found in your well and storage tank components. So that’s why you don’t want to add too much. You don’t want to do damage to your well.
Most of the living organisms are killed when they come in contact with these chlorine chemicals. There also can be disinfection by-products formed, such as bromates, trihalomethanes such as chloroform, and other by-products when you’re adding the chlorine. That’s why when you have to add the chlorine, you got to make sure you purge the water. You don’t use it until the well is free of chlorine and disinfection byproducts.
When should you chlorinate your well?
So, when should you shock chlorinate? Like, what’s the point? Why should you shock chlorinate? Well, many people shock chlorinate their well when they’re selling their home, buying a home, or there is a new well they are not familiar with. They tested the water, and it had coliform bacteria.
That’s usually the first step. They want to shock chlorinate and make sure that it’s not the well itself. It might just be some contamination caused by some work that was done in the well. So you want to shock chlorinate or sanitize your well whenever a new well has been constructed, and this is almost always done by the well professional. Again, anytime the well is open for repair, the well contractor will do this.
Flood water can enter the well, and that’s a disaster. You definitely need to sanitize your well, and that usually requires getting a well professional to look at it, too. So, if you put in a new tank, pump, or pressure tank, or you’ve worked on the piping, say you’ve replaced the piping, it’s a good idea to sanitize that piping. Or if you have odors.
Sometimes, if you have odors or slime, you can do a little shock chlorination, and that can often buy you many months before the odors return. Not always, but that is a good first step if you have odors. Usually, people sanitize their wells to kill bacteria.
Okay, so basically, there are a bunch of cautions involved with this. Obviously, if you could walk over to your well, see the head of the well, and see a small plastic plug on there—it’s usually plastic, but it might be metal—then you could chlorinate the well yourself. But if you see a plug on there that you can easily remove to access the well, and if you’re careful and you follow the right procedure, then you could chlorinate the well yourself.
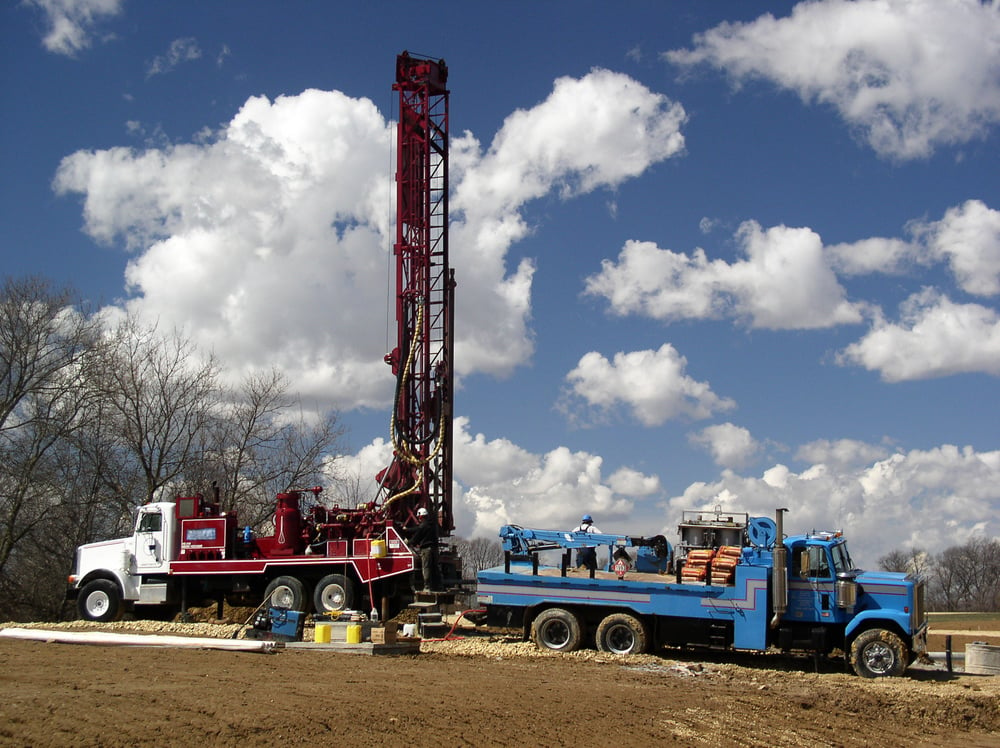
However, if you’re unfamiliar with it, you definitely don’t want to start disassembling the top of your well or working on your well. You want a well professional to do it. It could be a well pump contractor or a well driller. They will offer this service to sanitize your well.
Okay, so one thing to know: Shock chlorinating your well may cause your water to turn dark. The chlorine may clean the well shaft, pipe, iron, and sediment. This water may be high in sludge and cause damage to pipes or fixtures. Obviously, you don’t want to run water super high in sediment or rust in your water softeners or in your water heater.
You want to shock chlorinate the well, let it sit for 6-12 hours, and flush it out into the ground. Run an outside hose bib so you don’t run heavily chlorinated water in your house and then in your septic tank, either.
Procedure
So we’re going to talk about the procedure here in a minute, but one question we get is, what type of bleach should we use? Well, it’s best to try dry pellets or powdered bleach certified for potable water. A second really good option is to use liquid pool chlorine, which is pure sodium hypochlorite. Hopefully, you can find pool chlorine in the Home Depot or Lowe’s or hardware stores, but pool supply companies have it, and basically, it’s liquid 10-12% sodium hypochlorite.
The worst option is to use household laundry bleach, such as Chlorox. This contains unwanted chemicals besides chlorine. So we don’t recommend that. But you can use pool chlorine, which is usually the easiest to find. You can order a kit. It has little pellets and powder, and the powder can be mixed with water. Then you pour that down the well, and you can drop a few pellets in there, hopefully dropping down below the submersible pump and chlorinating the bottom of your well. So you can use dry pellets, powdered bleach, or pool chlorine.
We’re often asked about hydrogen peroxide, and it doesn’t work well for sanitizing the well; there's no point in using it.
We’ll start by discussing dry pellets or powdered bleach because that’s the easiest way to go about it. The dry pellet method, which is 70% calcium hypochlorite, can be used for wells, storage tanks, or cisterns. The amount of tablets and granules used depends on the amount of water in your system. So, half the total treatment will be completed with chlorine pellets, and the other half will be completed with granular chlorine.
The kits come with pellets and powder. A 1 to 200 parts per million chlorine concentration is ideal for sanitizing the well. If you want to be conservative, start out with 100 parts per million. To produce 100 parts per million, use two ounces of chlorine pellets or granules for each hundred gallons of water in the well.
If your water has a high iron or hydrogen sulfide content, you might need more chlorine to get your hundred parts per million residual. So, the idea is that before you do this, you want to bypass your water softener and other water treatment equipment. If you have a well house, we recommend cleaning the well house – get everything really clean, hose it out, spray it out with a little bit of bleach, and sanitize the inside and around the well house and in the pressure tank. Remove debris, hose out the deposits, and remove the small well inspection plug on top of the well.
There may be a rounded cap for wells, particularly those that have been installed with pitless adapters. You can remove the cap and, if possible, measure the depth of the water in the well. That’s pretty hard to do. It’s better to refer to the table. I won’t repeat the table here, but it’s in the guide. But it will tell you how much chlorine to use. There are a couple of rules of thumb, but you can also estimate the well and the water depth from your well log. Usually, when your well is drilled, they give you a well log. It will tell you how much and how deep the well is.
Again, caution, well caps, and seals are integral to the safety and integrity of your well. Often, they are regulated by state and local codes, so you have to be careful to comply with all applicable codes whenever opening your well. If you are unsure about any of these steps, seek the assistance of a qualified, licensed well driller, pump installer, or contractor.
If you don’t know one handy, we recommend you go to the National Ground Water Association site, wellowner.org, where you can find a certified well contractor in your area. They're easy to find, and the neighbors usually can recommend one if you just moved in. You can also look in the well log.
So, mix the determined amount of granules in a clean 5-gallon bucket and then pour that solution down the well to sanitize the upper portion of the well. Then drop one tablet into the well and listen to hear if the tablet hits the water. Even if the well is 400 feet, you’ll hear a “plink.”
If you don't hear the tablet hit the water, then there is no point in adding pellets; it’s not going to work. There must be wire guard if there’s something preventing the pellet from entering the water. If the tablet hits the water, which it usually does, drop the remaining determined number of sanitizing pellets needed into the well. So, this can be the same with bleach, but after you’ve added the bleach and water or the pellets to the well, then you need to circulate the water in the well.
It’s really easy to do. You get a hose and run the water until you smell chlorine. Then, run that water back down the well. Because you’ve got a half-inch threaded plug on top of the well, you can take that off and squirt the water back down the well. So, after approximately 15 minutes of circulating the water, you should be getting the strong chlorine odor present.
If not, you could add more if it wasn’t estimated correctly. But generally, at that point, you’ll smell very strong chlorine. Now, after you have done that, you want to allow the sanitized water to stand in the system for at least 6 hours. But we’d prefer 10-12 hours. Then, open an outside faucet and flush the system until the water runs chlorine-free. Repeat the flush operation of the faucet in the system.
It’s okay to run a little bit of water into the house, especially if you see the water is not dark, sludgy, or full of sediment. You could run a little bit of chlorine water into the house; it won’t kill off your septic tank, but you don’t want to run a lot of heavy chlorine solution into your septic tank.
Of course, if your water doesn’t flow for any reason, that’s a disaster, and don’t continue to run the pump if you don’t get a flow of water. So, after the chlorine has been left in the well and you discharge the water, you want to wait 2-3 weeks, and then you want to retest for coliform bacteria.
So, it’s pretty much the same procedure with chlorine bleach. You first start by cleaning the well house, and you run the well and determine how much chlorine you use. But you don’t want to just pour household bleach, pool chlorine, or any liquid chlorine straight down the well. That’s not what you’re doing. What you’re doing is you’re mixing up the estimated amount that you need with water. And then you’re pouring 5-10 gallons of water down the well. For instance, say your well is 4 inches in diameter and has a depth of 400 ft. The water level is a hundred ft. below the surface. Therefore, you have 300 ft. in the well.
In this chart, you want to use 1.5 gallons of 5% bleach or 3-quarters of a gallon of 10% bleach. So you’d use somewhere around half a gallon to a gallon of pool chlorine in 5-10 gallons of water.
Generally, they recommend mixing the chlorine solution with about 10 times as much water to dilute it and then pouring that down. You don’t want to pour super strong pure bleach down the well. And then again, whether you’re using pellets or liquid, you run the water until you smell the chlorine, turn it off, don’t use it, and let it sit for 6-12 hours.
If you have a high-range test kit, that’ll be the best; it’s not expensive. Then, you want to test the water at the end of 6-12 hours, and hopefully, you still have more than 10 parts per million left. If you do, then you’re good to go.
That’s the time to flush and let the water run until all the chlorine is gone. You can wait to use the water for a few days and make sure there is no chlorine left. But if you retest it and it’s below 10 parts per million, then that means there’s such a huge chlorine demand that you need to do it again.
Precautions
A question many people have is, what precautions should I take before I do the chlorination? Well, like I said, if you’re not familiar with your well or well construction, you might consider hiring a licensed well driller or a pump contractor. You should definitely take some precautions; concentrated chlorine can be dangerous.
Powdered bleach has 70% chlorine, so it’s very important to wear eye goggles and rubber gloves. If you get any bleach on your clothes, it’s going to ruin them, so protect yourself, your eyes in particular. Mix and add the chlorine in a well ventilated area, you don’t want to do it and get fumes inside a small area. Make sure your family and pets don’t use the water during the process. Prevent electric shock before removing the well cap or cover by turning the pump circuit breaker off. Definitely wear waterproof boots around the well.
I would never touch a panel or any kind of shut-off switch unless I had well-insulated boots or was standing on a board or something. You don’t want to stand in water while you reach out to turn off the circuit breaker in the well shed, so you want to exercise some caution. Before you begin again, make sure to shut off the water to carbon filters, reverse osmosis systems, your softener, and your iron filter.
Another question comes up: When can I use the water again? Well, generally, they say you want to flush about 4 well volumes, so for instance, a 4-inch well has 70 gallons per hundred foot of depth. So if you have 200 feet and 140 and 150 gallons of water in the well, 4 times that would be 600. That’s 600 gallons. That’s just in a 4-inch well. If you have a 6-inch well, those have 6-inch diameters. Those have 150 gallons per hundred feet.
So, it’s a good idea. Maybe a lot of folks don’t do it, but 4 well volumes is safe because another problem that could happen is when you chlorinate the well, it can leach out some undesirable metal levels. Arsenic metals can sometimes increase, and other heavy metals can increase for a little bit. You get the chlorine byproducts by super shocking the well. And sometimes, even when the chlorine is gone, those byproducts can still be there, so 4 well volumes, especially before you drink the water, is a good idea.
So that’s basically it. It does wonders. A lot of people are just so happy after they shock the well. They can’t believe how great the water is. Sometimes, the odors are gone for months, and then they come back.
Often, shocking the well will get rid of the bacteria that is there because the well wasn’t properly sanitized after some work was done on it. I would say 90% of all well guys are super good at this. They know this is a real issue in the industry’s contamination of wells because they are moving their rigs from one site to the next, so they take great pains to sanitize their drilling rig and tools.
Maybe bacteria from another well is contaminating your well, and you don’t even know. It could be spread around. So if you come up with a test positive for coliform and you had your well worked, obviously that could be the cause of it. But if you sanitize it once, wait several weeks or a month or two later, retest it, and it’s gone, you might want to test it again a month or two later to make sure. But usually, you got rid of it.
In other words, your well is contaminated with something from the surface. Either the well is being worked on, or maybe the well cap was loosened, and some critters got down in there. Insects can cause a positive coliform. So you have a situation where you can clean it up just by sanitizing it.
However, which is really common, people sanitize the well to get rid of the odor or they sanitize to get rid of coliform bacteria, they retest it, and it’s fine. They tested it another month later, and it's back. Then you have an actual contamination problem, and you must figure out the source. Why is that well becoming a positive for coliform bacteria? It’s coming from somewhere on the ground since the seal is okay and everything on top is fine. Then you know that it is coming from something. Maybe it’s too close to a septic tank, or something is happening.
I keep saying this, but it is a good idea to call a well contractor, well driller, well professional, get help with this sort of thing. But we have many people that sanitize their well, no problem. It can be done. You can do it yourself, but if you have any qualms about it or you think you can’t and are not sure about it, you shouldn’t do it. Also, if you go over to it, and you don’t have an easy way to access it, and you have to disassemble the top of the well to get to it, then that’s the sign you shouldn’t be doing it. Okay, well I hope that was helpful.
Again, if you want to get the guide, which is a lot easier to follow than me talking about it, I still hope that was helpful. Just go to our website, cleanwaterstore.com/podcast, and look for episode number 7, or if you’re on mobile and want to do it easily, just text 44222 and text the word SHOCKGUIDE to 44222, and we’ll automatically we’ll get going to you. Saves you a lot of money, gets rid of odors, bacteria, and iron, and you don’t even have to have chlorine in your house. You can easily filter it out. We’re going to de-mystify that and go over chlorinators. Have a great week.
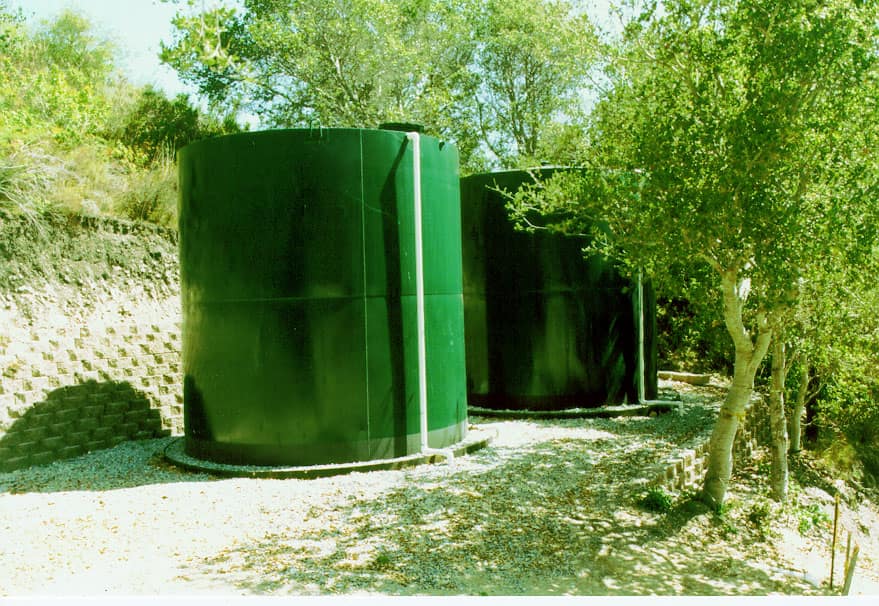
Have a Storage Tank? Learn How Much Chlorine To Add to Storage Tanks to Kill Bacteria